Visual Testing
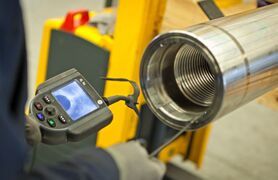
Visual inspection is a common method of quality control, data acquisition, and data analysis. Visual Inspection, used in maintenance of facilities, mean inspection of equipment and structures using either or all of raw human senses such as vision, hearing, touch and smell and/or any non-specialized inspection equipment. Inspections requiring Ultrasonic, X-Ray equipment, Infra-red, etc. are not typically regarded as Visual Inspection as these Inspection methodologies require specialized equipment, training and certification.
...more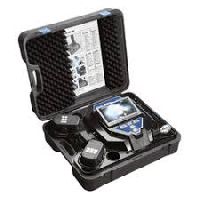
Visual Inspection Equipment
Flexible Videoscopes can be used to check corrosion and erosion inside of heat-exchanger tubes, engine holes, welds on tubes and other inaccessible locations. The economical equipment can be used to take picture shots or video shots of any locations and record the same on the built-in micro-SD cards and down load to the PC. The images can then be sent over the internet to base station or the customer inspection agencies instantly.
...more
ultrasonic thickness measurement
In the field of industrial ultrasonic testing, ultrasonic thickness measurement (UTM) is a method of performing non-destructive measurement (gauging) of the local thickness of a solid element (typically made of metal, if using ultrasound testing for industrial purposes) basing on the time taken by the ultrasound wave to return to the surface. This type of measurement is typically performed with an ultrasonic thickness gauge.
...more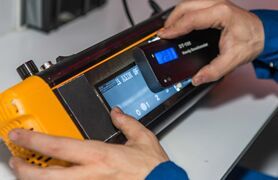
Radiographic Film Interpretation
Discontinuities are interruptions in the typical structure of a material. These interruptions may occur in the base metal, weld material or "heat affected" zones. Discontinuities, which do not meet the requirements of the codes or specifications used to invoke and control an inspection, are referred to as defects.
...more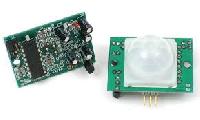
passive infrared sensor
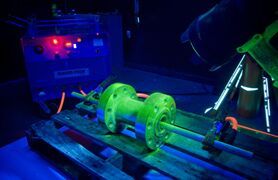
magnetic particle testing
Magnetic particle Inspection (MPI) is a non-destructive testing (NDT) process for detecting surface and slightly subsurface discontinuities in ferromagnetic materials such as iron, nickel, cobalt, and some of their alloys. The process puts a magnetic field into the part. The piece can be magnetized by direct or indirect magnetization. Direct magnetization occurs when the electric current is passed through the test object and a magnetic field is formed in the material. Indirect magnetization occurs when no electric current is passed through the test object, but a magnetic field is applied from an outside source. The magnetic lines of force are perpendicular to the direction of the electric current, which may be either alternating current (AC) or some form of direct current (DC) (rectified AC).
...more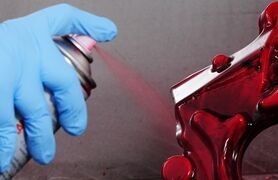
Liquid Penetrant Testing
Dye penetrant inspection (DPI), also called liquid penetrant inspection (LPI) or penetrant testing (PT), is a widely applied and low-cost inspection method used to locate surface-breaking defects in all non-porous materials (metals, plastics, or ceramics). The penetrant may be applied to all non-ferrous materials and ferrous materials, although for ferrous components magnetic-particle inspection is often used instead for its subsurface detection capability. LPI is used to detect casting, forging and welding surface defects such as hairline cracks, surface porosity, leaks in new products, and fatigue cracks on in-service components.
...more
HEATING, VENTILATING AND AIR CONDITIONING
HVAC is a major sub discipline of mechanical engineering deals with the technology of indoor air quality management of buildings and human comfort. HVAC system designing deals with heating, ventilation systems designing, air conditioning, refrigeration system designing and equipment selection. TRAINING FACILITIES Experienced Engineers as Faculties. Excellent Materials Provided. (Manuals, Demo softwares, Design Chart, Drawings of sample Projects etc.). Excellent and Efficient Placement Cell. Onsite Training.
...more
electromagnetic yoke
Magnetic Particle Inspection (MPI) Yokes are portable, economical and highly reliable for detection of surface flaws in steel and iron components.AC Magnetic Particle Inspection Yoke is the new generation of light weight, ergonomically designed yokes that improve job performance and productivity by reducing operator arm and wrist fatigue when testing in tight, confined and overhead areas.
...more
Eddy Current Testing
Eddy-current testing (also commonly seen as eddy current testing and ECT) is one of many electromagnetic testing methods used in nondestructive testing (NDT) making use of electromagnetic induction to detect and characterize surface and sub-surface flaws in conductive materials.
...more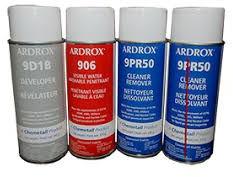
Dye Penetrant Inspection Kit
Owing to our in-depth knowledge and vast experience in this domain, we have been able to offer premium quality Dye Penetrant Testing Kit.
...more
Doorbell
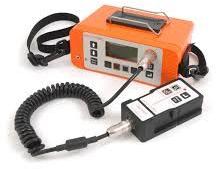
Cover Meter
Non Destructive method to determine the concrete cover and locating rebars and establish corrosion of reinforced steel.
...more
Electronic Components

Integrated Circuits

rerecord able voice id

waterfall
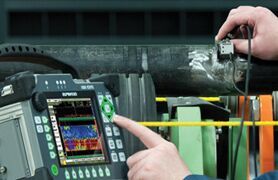
Ultrasonic Testing
Ultrasonic testing (UT) is a family of non-destructive testing techniques based on the propagation of ultrasonic waves in the object or material tested. In most common UT applications, very short ultrasonic pulse-waves with center frequencies ranging from 0.1-15 MHz, and occasionally up to 50 MHz, are transmitted into materials to detect internal flaws or to characterize materials. A common example is ultrasonic thickness measurement, which tests the thickness of the test object, for example, to monitor pipework corrosion. Ultrasonic testing is often performed on steel and other metals and alloys, though it can also be used on concrete, wood and composites, albeit with less resolution. It is used in many industries including steel and aluminum construction, metallurgy, manufacturing, aerospace, automotive and other transportation sectors.
...more
radiography Testing
Industrial radiography is the use of ionizing radiation to view objects in a way that cannot be seen otherwise. It is not to be confused with the use of ionizing radiation to change or modify objects; radiography's purpose is strictly viewing. Industrial radiography has grown out of engineering, and is a major element of nondestructive testing. It is a method of inspecting materials for hidden flaws by using the ability of short X-rays and gamma rays to penetrate various materials. Two ways to inspect materials for flaws is to utilize X-ray computed tomography or Industrial computed tomography scanning.
...more
ELECTRICAL DESIGNING AND DRAUGHTING
This Diploma Certificate program covers the full design and analysis of Electrical Building Services from the fundamentals to Power System design, Wiring and Cable Management Systems, Lighting systems, Earthing Design and Calculations, Fire Alarm Systems, HVAC and STP Controlling Systems, Communication systems like Networking, Security Surveillance Systems like CCTV, Access control System etc.
...moreBe first to Rate
Rate ThisOpening Hours