Visual Testing
visual testing (vt) is the oldest and most common nondestructive testing (ndt) techniques. It is typically the first step in the examination process to inspect a variety of product forms including castings, forgings, machined components and weld elements, according to the ndt training & test center. Visual inspection is the process of examination and evaluation of systems and components by use of human sensory systems aided only by mechanical enhancements to sensory input such as magnifiers, dental picks, stethoscopes, and the like. The inspection process may be done using such behaviors as looking, listening, feeling, smelling, shaking, and twisting.
...more
Ultrasonic Testing Services
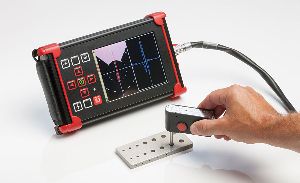
Ultrasonic testing (UT) is a family of non-destructive testing techniques based on the propagation of ultrasonic waves in the object or material tested. In most common UT applications, very short ultrasonic pulse-waves with center frequencies ranging from 0.1-15 MHz, and occasionally up to 50 MHz, are transmitted into materials to detect internal flaws or to characterize materials. A common example is ultrasonic thickness measurement, which tests the thickness of the test object, for example, to monitor pipework corrosion. Ultrasonic testing is often performed on steel and other metals and alloys, though it can also be used on concrete, wood and composites, albeit with less resolution.
...more
radiography Testing
Radiographic Testing (RT) is a method of non-destructive testing where many types of manufactured components can be examined to verify the internal structure and integrity of the specimen. Industrial Radiography can be performed utilizing either X-rays or gamma rays. Both are forms of electromagnetic radiation. The difference between various forms of electromagnetic energy is related to the wavelength. X and gamma rays have the shortest wavelength and this property leads to the ability to penetrate, travel through, and exit various materials such as carbon steel and other metals.
...more
magnetic particle testing
A technician performs MPI on a pipeline to check for stress corrosion cracking using what is known as the "black and white" method. No indications of cracking appear in this picture; the only marks are the "footprints" of the magnetic yoke and drip marks.A close-up of the surface of a (different) pipeline showing indications of stress corrosion cracking (two clusters of small black lines) revealed by MPI. Cracks that would normally have been invisible are detectable due to the magnetic particles clustering at the crack openings. The scale at the bottom is numbered in centimetres.Magnetic particle Inspection (MPI) is a non-destructive testing (NDT) process for detecting surface and shallow subsurface discontinuities in ferromagnetic materials such as iron, nickel, cobalt, and some of their alloys.
...more
Liquid Penetrant Testing
Liquid Penetrant Testing (PT), also called liquid penetrate inspection (LPI) or Dye penetrant inspection (DP), is a widely applied and low-cost inspection method used to check surface-breaking defects in all non-porous materials (metals, plastics, or ceramics). The penetrant may be applied to all non-ferrous materials and ferrous materials, although for ferrous components magnetic-particle inspection is often used instead for its subsurface detection capability. LPI is used to detect casting, forging and welding surface defects such as hairline cracks, surface porosity, leaks in new products, and fatigue cracks on in-service components.
...more
eddy current testing service
Eddy-current testing (also commonly seen as eddy current testing and ECT) is one of many electromagnetic testing methods used in nondestructive testing (NDT) making use of electromagnetic induction to detect and characterize surface and sub-surface flaws in conductive materials. The two major applications of eddy current testing are surface inspection and tubing inspections. Surface inspection is used extensively in the aerospace industry, but also in the petrochemical industry. The technique is very sensitive and can detect tight cracks. Surface inspection can be performed both on ferromagnetic and non-ferromagnetic materials
...more
Certification Training Services

radiography Testing
Radiographic Testing (RT) is a method of non-destructive testing where many types of manufactured components can be examined to verify the internal structure and integrity of the specimen. Industrial Radiography can be performed utilizing either X-rays or gamma rays. Both are forms of electromagnetic radiation. The difference between various forms of electromagnetic energy is related to the wavelength. X and gamma rays have the shortest wavelength and this property leads to the ability to penetrate, travel through, and exit various materials such as carbon steel and other metals.
...more
Gamma Radiography
Radiographic testing (rt) is a method of non-destructive testing where many types of manufactured components can be examined to verify the internal structure and integrity of the specimen. Industrial radiography can be performed utilizing either x-rays or gamma rays. Both are forms of electromagnetic radiation. The difference between various forms of electromagnetic energy is related to the wavelength. X and gamma rays have the shortest wavelength and this property leads to the ability to penetrate, travel through, and exit various materials such as carbon steel and other metals.
...more
Radiographic Film Interpretation

Ultrasonic Flaw Detection Service
Be first to Rate
Rate ThisOpening Hours