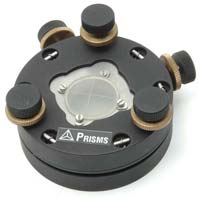
Spindle Target
we offer spindle target of fine quality. Spindle target is used for mounting and aligning the spindle and bore rotation axis. Spindle targets are special purpose mounted reticule targets. The reticule may be a cross line on a mirror or on a beamsplitter. In autocollimator application the mirror surface is used to measure angular tilts. In alignment telescope application the target cross line reticule is used for measurement of linear shifts. Our spindle target is precisely manufactured using the premium grade raw material that is sourced from known and reliable dealers. Additionally, it is being presented at the best rates in the industry. spindle targets are special purpose mounted reticule targets. The reticule is a cross line on a mirror. In autocollimator application the mirror surface is used to measure angular tilts. In alignment telescope application the target cross line reticule is used for measurement of linear shifts.two adjustment screws are provided for linear movement of the reticule to center the reticule to the axis of rotation.three leveling screws are provided for tilting the mirror surface for aligning the surface perpendicular to the axis of rotation.types of target1) 25 mm dia front surface mirror2) 25 mm dia front surface mirror with 10 microns width cross line 3) 25 mm dia cross line (parallelism < 2 arc secs)4) 25 mm beam splitter with 10 microns width cross line (parallelism < 2 arc secs)
...more
Shear Plate Collimation Tester
shear plate collimation tester allows quick testing of collimation of laser light by utilizing shearing interferometry and also used to measure wave front curvature and quantify divergenceconvergence magnitude. The shear plate collimation tester, which we offer, provides accurate results and is properly tested for its hassle free performance before its dispatch. Our shear plate collimation tester is designed by our experts in accurate precision. Clients can avail shear plate collimation tester from us at affordable prices.
...more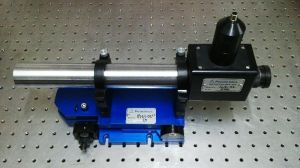
Precision Horizontal Stand
90,000 Per Piece
Preceison Horizontal Stand with two axis tilt for Autocollimator or ALignment Telescope. Could be mounted on a Pedestal Stand or a Tripod STand or a Pillar type stand or clamped to a flat Honeycomb table.
Size : 38 mm/50 mm/57mm/70mm Diameter
Brand Name : Prisms India
...more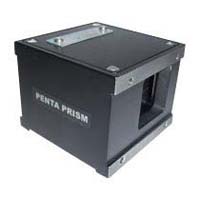
Pentaprism
we are the only manufacturer & suppliers of pentaprism in india. a pentaprism also called an optical square is used for checking squareness of machine vertical column to the horizontal bed. also useful in combination with standard reflector for flatness of surface table.
...more
Pedestal Stand
125,000 Per Piece
Pedestal Stand Mount for AUtocollimator or for ALignment Telescope. Could be rolled over in Shop Floor. Height adjustment to suit the machinery height.
...more
Optical Windows
optical windows are manufactured to clients requirements. Windows are processed in double side polishing machine and by optical contact methods. Very high degree of parallelism to less than 1 arc second can also be supplied.
...more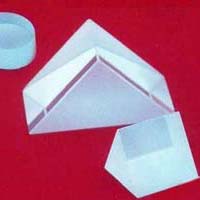
Optical Prisms
optical prisms manufactured are supplied to original equipment manufacturers and research organizations. These prisms are made to client’s specifications. In recent years we have excelled as a manufacturer of prism and are today one of the noted prism manufacturers in india. A) right angle prisms b) penta prisms c) equilateral prisms d) dove prisms e) amici roof prisms f) anamorphic prisms g) corner cube prisms.
...more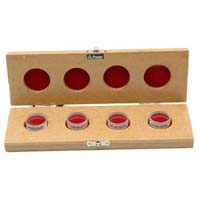
Optical Parallels
we are the only manufacturer & suppliers of optical parallels in india. Optical parallels are used for checking flatness and parallelism of micrometer measuring faces. These are supplied as a set of four numbers with thickness increment of 0.125 mm (one fourth of the pitch of the micrometer). Optical parallels are made from fused silicafused quartz material as the material has environmental durability, and a low coefficient of thermal linear expansion and as well resistant to abrasion.the parallels are manufactured to comply with the npl (national physical laboratory) specification moyscmi54 accompanied by flatness inspection report inspection in laser fizeau interferometer reference flat (»20) traceable to nist. evaluation of flatness with licensed quick fringe software cosmetic defects : according to us mil std supplied in wooden box
...more
Optical Flats
We manufacture highly precise optical flats that are in large demand in the market. Our precision optical flats are made with optical glass fused quartz materials. The flatness is inspected with a laser fizeau interferometer having a lambda20 transmission flat. The flatness is quantified with a help of a licenced fringe analysis software. applications : inspection of flatness of mechanical seals, pump valves, lapped components
...more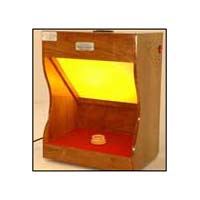
Monochromatic Light Source
we are the only manufacturer & suppliers of monochromatic light source in india. Monochromatic light source also called as checklite is manufactured with the best burma teak wood for long life. Model mls-01 is used by placing the optical flat on top of the lapped part and observing the light bands from top of the optical flat. Model mls-02 is used by placing the lapped surface on top of the optical flat and the light bands are viewed through the mirror. Model mls-01 is used by placing the optical flat on top of the lapped part and observing the light bands from top of the optical flat. Model mls-02 is used by placing the lapped surface on top of the optical flat and the light bands are viewed through the mirror.model mls-01this is used when the optical flat is less than 150 mm diameter. The optical flat is placed over the polished part under inspection. The light bands are viewed over the optical flat from above. model mls-02the part to be inspected is placed over the optical flat and the light bands are viewed from beneath after reflection from a mirror. This type monochromatic light source is used when the part under inspection is thin and of large diameter. If an optical flat of large diameter is to be placed on such thin parts there would be deformation of fringes due to the weight of large size optical flat. To avoid this the part to be inspected is placed over the optical flat and the fringes are viewed after reflection from a mirror placed below. the master surface of the optical flat face upwards and the test surface face downwards and are in contact to view the light bands. Mls-02 is suitable for use with 200 mm diameter optical flat. On request mls to suit optical flats larger than 200 mm diameter is manufactured against specific order. specifications material : teakwood construction light source : 35w sodium wavelength : 0.575 micron = power 220v50hz (110v available on request)
...more
Micrometer Anvil Checker
we are the only manufacturer & suppliers of micrometer anvil checker in india. Measures parallelism (non contact) between the anvil and spindle faces. It employs the use of an autocollimator that could also be used for surface table calibration. A special micrometer anvil checker designed and developed by prisms india replaces the use of many sets of optical parallel or gauge blocksslip gauges to cover a wide range of micrometers. It employs the use of an autocollimator that could also be used for surface table calibration. principle of workingthe light from the autocollimator is divided into two parts by reflection at the faces of a 90 deg prism, so that each part is directed towards one of the gauging tips, the polished surface of which acts as a suitable reflector. The angle between the reflecting faces of the prism is precisely 90 degrees, so that the two reflected beams are collinear. The light beam are reflected at the anvil surfaces and re-enter the instrument after a second reflection from the 90 degrees prism. Each beam forms a reflected image of the scale, and if the anvils are parallel these images coincide; otherwise the departure from parallelism is readily measured by reading the separation of the images against the fixed scale. Moreover, the square ness of the face of the micrometer spindle to the axis of rotation can also be checked, by measuring any displacement of the appropriate image as the spindle is rotated. the prism is placed with the junction of its reflecting faces nominally central with the instrument object glass, and with the faces in line with the micrometer anvils. Displacement or tilt of the prism has no effect upon measurement, but rotation of the prism (so that its edge is inclined to the anvils) will produce a separation of the reflected images at right angles to the micrometer axis. The prism must be adjusted rotationally until this separation is a minimum. Any error in the 90 degrees angle between the reflecting faces is doubled in its effect upon the reflected images, since two reflections occur at each face. the main advantage of this instrument is that, all sizes of micrometer ranging from 25 mm to 300 mm could be inspected for parallelism, whereas you need to have gauge blocks or optical parallel for every size of micrometer. the graduated reticule of the instrument (mac-01) reads 1 division = 0.923 microns (say 1 micron) parallelism error of the spindle and the anvil of the micrometer. another model (mac-02). Is also available with least count of 0.739 microns. moreover this instrument with micrometer readout could also be used as an autocollimator for straightness, parallelism, squareness, rotary table calibration measurements. mac-01 – 3 arc secsmicrometer div , range 3 meters, 14.5 microns per meter mac-02 – 1 arc secmicrometer div, range 4.5 meters, 4.83 microns per meter.
...more
Michelson Interferometer
the michelson interferometer is the most common configuration for optical interferometry and used in physics & optics lab in educational institutions. Michelson interferometer can be added with parts to perform as fabry perot & twyman green interferometers. The michelson interferometer is an optical instrument of high precision and versatility. It generally used in investigations that involve small changes in optical path lengths. With the michelson interferometer, one can produce circular and straight-line fringes of both monochromatic light and white light. One can use these fringes to make an accurate comparison of wavelengths, measure the refractive index of gases and transparent solids, and determine small changes in length quite precisely. the instrument can be used as a stable mode selecting resonator element in laser cavities as well. The michelson interferometer is perhaps the best known and most basic in a family of interferometers which includes the fabry-perot interferometer, the twyman-green interferometer and the mach-zehnder interferometerthe prism make michelson interferometer is constructed on a machined steel base. High precision movable-mirror with smooth fine movement of 0.6 microns facilitates fringe counting. you can upgrade by adding few parts to work as fabry perot interferometer & twyman green interferometer.michelson interferometer interference fringes observation study of equal inclination, equal thickness & white light interference fringes measurement of wavelength of the sodium d-lines measurement of the wavelength separation of sodium d-lines study of refractive index of gases at varying pressure the refractive index of transparency slice fabry-perot interferometer the multi-beam interference measurement of the wavelength of he-ne laser observation of the interference of sodium d-lines twyman-green interferometer demonstration of the principle of twyman-green interferometer checking principle of defects in optical components.(flat mirrors, windows, prism & lenses model pim # precision interferometer parts p-im-01: instrument base p-im-02: mirror with kinematic tilt and linear movement by micrometer p-im-03: adjustable mirror with kinematic tilt p-im-04: beamsplitter & compensator assembly p-im-06: viewing telescope p-im-06: pin hole screen collimator with kinematic tilt p-im-07: diffuser glass with mount p-im-08: kinematic laser diode mount (12 mm dia) p-im-09: equilateral prism and holding table p-im-10: air chamber with pressure gauge p-im-11: fabry perot etalon assembly with kinematic tilt p-im-12: laser diode 3 mw with power supply. p-im-13: he-ne laser 1 mw with power supply. p-im-14: sodium vapour lamp 35 watts with power supply. p-im-15: rotating slice. p-im-16: laser beam expander lens p-im-17: he-ne laser mount model: mim # michelson interferometer parts: p-im-01 to 07 special features optics: 25 mm diameter (clear aperture:20mm), flatness to »6 @ 633nm. p-im-02 kinematic mirror with linear movement: one division of the micrometer (0.01mm) corresponds to 0.6 microns movement of the mirror. p-im-03 adjustable mirror: coarse linear travel of 5 mm and movement along a curve for inspection of prism.
...more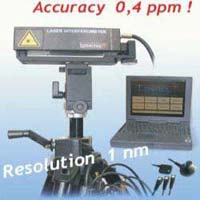
Linear Interferometer
linear interferometer is used for the investigation of the machine tools’ geometry. The linear interferometer used for measurement of positioning accuracy of cnc & cmm. compactly designed and easy to carry from one place to another. The linear interferometer, which we offer, has different measurement capabilities and can be assessed as per one’s needs. This perfectly-designed linear interferometer is demanded widely in industries for diverse purposes.
...more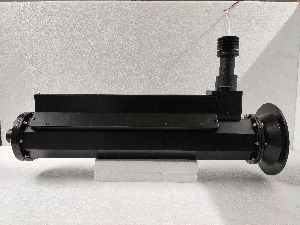
IR Collimator
1,000,000 Per Piece
Custom biult Collimator

Gun Barrel Telescope
gun barrel telescope is used for the inspection of gun barrel straightness. Our gun barrel telescope delivers prompt results in perfect accuracy. Prisms india gun barrel telescope is designed for 600 mm focal length and can provide various size flanges to suit the bore of the gun barrel.
...more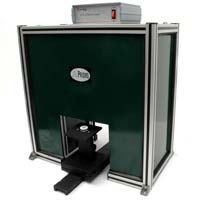
Grazing Incidence Interferometer
We are offering grazing incidence interferometer. Our grazing incidence interferometer is used for inspection of non-reflective lapped components. We use high quality parts and advanced technology to manufacture the grazing incidence interferometer. We offer our customers with our high class grazing incidence interferometer a very low price. Again we are the only manufacturer of this equipment in india.
...more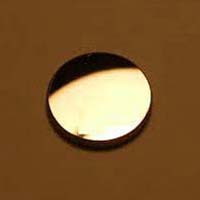
Front Surface Optical Mirrors
Front Surface Optical Mirrors (Front Surface Al+SiO coated mirrors) are custom made to clients requirement. Be it a circular, square, rectangular or any other shape specified by the clients could be manufactured by Prisms India. Clients can avail Front Surface Optical Mirrors from us at most affordable prices.
...more
Flatness Gauge
30,000 Per Piece
We are offering flatness gauge.
Application : Industrial Use

Flatness Bow gauge
Packaging Type : bag
Fizeau Interferometer
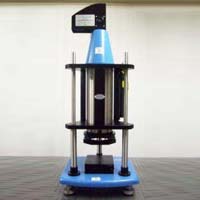
non contact flatness measurement interferometer also called fizeau interferometer for inspection of flatness of optical or mechanical parts. Many mechanical seal manufacturer use this interferometer for evaluation of flatness. In automobile parts many flat surfaces require inspection of flatness in light bands. Monochromatic light source and use of optical flat is replaced with fizeau interferometer.highlights technical mass products with flat surfaces specified to better than 0.1µm over a few cm are produced by millions per month. the production processes are lapping & polishing – and, increasingly more often, micro-machining; 90% have diameters under 50mm. iso 9000 requires tight inspection often 100%. the most common tool for this is the interferometer an esteemed value to engineers as does the stethoscope for the medical practitioner. principleinterferometer is shown in figure 1 (the basic layout of a fizeau autocollimator). A laser source is spatial y filtered via a microscope objective. This microscope objective is located at the focal point of a collimating lens. Between the microscope objective and lens is a cube beam-splitter. The collimated beam encounters a slightly wedged glass plate. This is the heart of the interferometer. The surface adjacent to the collimating lens is of good optical quality.however, the next surface is of exceptional optical quality, λ20 peak to valley (pv) or better. This is the reference surface and part of the collimated beam is reflected by this surface. Part of the collimated beam continues on to interrogate the component being tested. The return beam contains information on aberration introduced by the test surface. The two wave fronts recombine inside the interferometer.the cube beam-splitter diverts the combined beam towards a recording medium, either film or a ccd. An intermediate lens forms an image of the test surface onto the recording plane.
...more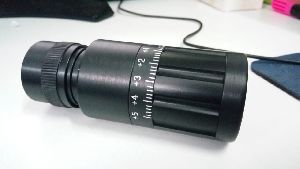
Diopter Telescope
diopter telescope is used for testing of diopter graduation in eyepieces of optical instruments and also for testing of optical power of lenses. Also, our diopter telescope provides accurate results in testing of lenses and other optical eyepieces. benefits measurement of optical power of lens testing of diopter graduation in eyepieces of optical instruments testing the astigmatism of telescopes measuring the field curvature of lenses
...more
Centering Microscope
100,000 Per Piece
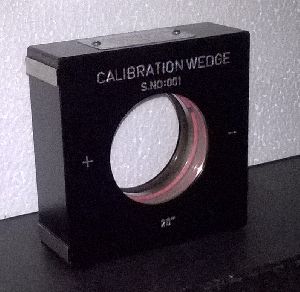
Calibration Wedge
100,000 - 300,000 Per Piece
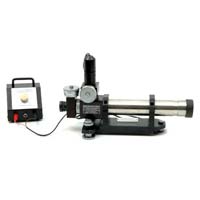
Autocollimator
150,000 - 400,000 Per Piece
autocollimator is a precise instrument for small angular tilt measurements. Prisms india offers a wide range of micro-optic visual autocollimators ranging from 3 arc secs to 0.5 arc secs resolution to suit the end users application and budget for straightness, squareness, flatness, rotary table calibration in machine tool industry. Wide range of stands and accessories are offered to suit various applications. Autocollimator with camera attachment available with software for straightness & flatness for machine geometry measurements. prisms india autocollimators are equipped with highly accurate micrometers. The mounting telescope tubes are made from high quality stainless steel material to avoid rusting
...moreOpening Hours