
Ultrasonic Thickness Gauge
UT (Ultrasonic Testing) In most common UT applications, very short ultrasonic pulse-waves with center frequencies ranging from 0.1-15 MHz, and occasionally up to 50 MHz, are transmitted into materials to detect internal flaws or to characterize materials. It is used in many industries including steel and aluminium,construction,metallurgy,manufacturing, aerospace, automotive &other transportation sectors. In service ultrasonic testing for preventive maintenance is used for detecting impending failure of rail road rolling stock axles, press columns, earth-moving equipment, mill rolls, mining equipment and other machines and components. The flaws to be detected include voids, cracks, inclusions, pipe, laminations, bursts and flakes. They may be inherent in the raw materials, may result from fabrication and heat treatment, or may occur in service from fatigue, corrosion or other causes. Ultrasonic testing can also be used to measure thickness of metal sections during manufacturing and maintenance inspections.
...more
magnetic particle inspection
MT (Magnetic Particle Testing) It is a non-destructive testing (NDT) process for detecting surface and slightly subsurface discontinuities in ferromagnetic materials such as iron, nickel, cobalt, and some of their alloys. The process puts a magnetic field into the part. The piece can be magnetized by direct or indirect magnetization. Direct Magnetization Direct magnetization occurs when the electric current is passed through the test object and a magnetic field is formed in the material. Indirect Magnetization Indirect magnetization occurs when no electric current is passed through the test object, but a magnetic field is applied from an outside source. Dry Particle Inspection In this magnetic particle testing technique, dry particles are dusted onto the surface of the test object as the item is magnetized. Dry particle inspection is well suited for the inspections conducted on rough surfaces. When an electromagnetic yoke is used, the AC or half wave DC current creates a pulsating magnetic field that provides mobility to the powder. The primary applications for dry powders are unground welds and rough as-cast surfaces. Dry particle inspection is also used to detect shallow subsurface cracks. Dry particles with half wave DC is the best approach when inspecting for lack of root penetration in welds of thin materials. Half wave DC with prods and dry particles is commonly used when inspecting large castings for hot tears and cracks. Wet Suspension Inspection Wet suspension magnetic particle inspection, more commonly known as wet magnetic particle inspection, involves applying the particles while they are suspended in a liquid carrier. Wet magnetic particle inspection is most commonly performed using a stationary, wet, horizontal inspection unit but suspensions are also available in spray cans for use with an electromagnetic yoke.
...more
Ultrasonic Thickness Measurement Services
Ultrasonic Thickness Measurement (UTM) Confirmation of component thickness can assist in the determination of life expectancy of any part. Ultrasonic Thickness Gages accurately measure wall thickness and corrosion of all metals, including steel and aluminum, plastic, ceramics and others. Thickness gauging is a method of performing non-destructive measurement (gauging) of the local thickness of a solid element (typically made of metal, if using ultrasound testing for industrial purposes) basing on the time taken by the ultrasound wave to return to the surface. This type of measurement is typically performed with an ultrasonic thickness gauge UTM Advantages Does not require access to both sides of the sample Can be engineered to cope with coatings, linings, etc Good accuracy (0.1 mm and less) can be achieved using standard timing techniques Can be easily deployed, does not require laboratory conditions Digital UTM gives directly Thickness on display
...more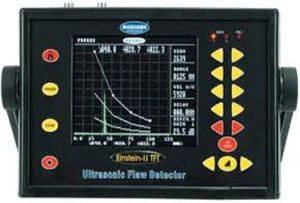
Ultrasonic Testing Services
Ultrasonic testing (ut) in most common ut applications, very short ultrasonic pulse-waves with center frequencies ranging from 0.1-15 mhz, and occasionally up to 50 mhz, are transmitted into materials to detect internal flaws or to characterize materials. It is used in many industries including steel and aluminium,construction,metallurgy,manufacturing, aerospace, automotive &other transportation sectors. In service ultrasonic testing for preventive maintenance is used for detecting impending failure of rail road rolling stock axles, press columns, earth-moving equipment, mill rolls, mining equipment and other machines and components. The flaws to be detected include voids, cracks, inclusions, pipe, laminations, bursts and flakes. They may be inherent in the raw materials, may result from fabrication and heat treatment, or may occur in service from fatigue, corrosion or other causes. Ultrasonic testing can also be used to measure thickness of metal sections during manufacturing and maintenance inspections
...more
Ultrasonic Testing Services
Ut (ultrasonic testing) in most common ut applications, very short ultrasonic pulse-waves with center frequencies ranging from 0.1-15 mhz, and occasionally up to 50 mhz, are transmitted into materials to detect internal flaws or to characterize materials. It is used in many industries including steel and aluminium,construction,metallurgy,manufacturing, aerospace, automotive &other transportation sectors. In service ultrasonic testing for preventive maintenance is used for detecting impending failure of rail road rolling stock axles, press columns, earth-moving equipment, mill rolls, mining equipment and other machines and components. The flaws to be detected include voids, cracks, inclusions, pipe, laminations, bursts and flakes. They may be inherent in the raw materials, may result from fabrication and heat treatment, or may occur in service from fatigue, corrosion or other causes. Ultrasonic testing can also be used to measure thickness of metal sections during manufacturing and maintenance inspections. Ut applications include castings forgings plates weld joints electrical and electronic component manufacturing production of steel aluminum titanium fabrication of structures such as air frames pressure vessels ships bridges motor vehicles machinery following defects are find out by ut cracks laminations shrinkage cavities bursts flakes pores bonding faults and other discontinuity
...more
third party inspection service
Third party inspection cr is unique in its ability to quickly provide trained and qualified technical specialists globally to verify both product and process quality. Cr is committed to delivering the highest quality technical service, assuring technical integrity, and to provide a quality report detailing findings in a timely manner. We operate globally providing our clients with a wide-ranging inspection services. We deliver integrated solutions, auditing and asset integrity services, to our clients ensuring conformance to standards and specifications, within their supply chain in all sectors. Our teams of engineers ensure that the quality and performance of products or installations meet applicable requirements, whether they are regulatory, voluntary or client specific. We help to improve the integrity, quality and efficiency of equipment, assure safe and health working conditions for employees and minimize the environmental impact of industrial activities. Cr's manpower deployment team can also provide qualified ndt personnel for your inspection projects on contract with strong onsite and offshore expertise. Our services are divided into in-process inspection material testing and non-destructive testing ndt level ii utmtptrt certified technicians ndt level iii utmtptrt certified product certification third party inspection & assurance welding consultancy (wps, pqr, wpq) qaqc & installation activities for onshoreoffshore qaqc consultancy (quality assurancequality control) api, asnt, aws, cswip, bgasnace certified engineersinspectorstechnicians
...more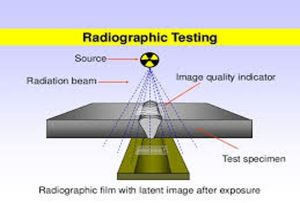
radiography testing services
RT (Radiographic Testing) Industrial radiography is used for a variety of applications but is commonly performed using two different sources of radiation, X-Ray and Gamma ray sources. The choice of radiation sources and their strength depends on a variety of factors including size of the component and the material thickness. Within the broad group of X-Ray and Gamma ray sources are a variety of camera choices with varying radiation strengths. CR Services X-Ray capabilities run the gamut from 4 MEV units utilized to radiograph extremely large and thick castings and forgings, to portable X-Ray cameras used for field weld applications and thin wall material inspection. Gamma sources vary from very low level fluoroscopic units to perform real time corrosion under insulation surveys, to Iridium (Ir192) and Selenium (Se 75) sources used for a variety of weld inspections, to Cobalt (Co 60) inspections for thick component testing.
...more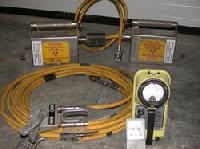
radiography testing services
12 Per Piece
Rt (radiographic testing) industrial radiography is used for a variety of applications but is commonly performed using two different sources of radiation, x-ray and gamma ray sources. The choice of radiation sources and their strength depends on a variety of factors including size of the component and the material thickness. Within the broad group of x-ray and gamma ray sources are a variety of camera choices with varying radiation strengths. Cr services x-ray capabilities run the gamut from 4 mev units utilized to radiograph extremely large and thick castings and forgings, to portable x-ray cameras used for field weld applications and thin wall material inspection. Gamma sources vary from very low level fluoroscopic units to perform real time corrosion under insulation surveys, to iridium (ir192) and selenium (se 75) sources used for a variety of weld inspections, to cobalt (co 60) inspections for thick component testing. There are many advantages to radiography including: inspection of a wide variety of material types with varying density, ability to inspect assembled components, minimum surface preparation required, sensitivity to changes in thickness corrosion, voids, cracks and material density changes, the ability to detect both surface and subsurface defects and the ability to provide a permanent record of the inspection. The disadvantages of radiography are: safety precautions are required for the safe use of radiation, access to both sides of the specimen are required, orientation of the sample is critical, and determining flaw depth is impossible without additional angled exposures. Radiographic testing is used extensively on castings and weldments. Radiography is well suited to the testing of semiconductor devices for cracks, broken wires, unsoldered connections, foreign material and misplaced components. Sensitivity of radiography to various types of flaws depends on many factors, including type of material, type of flaw and product form.
...more
radiographic testing services
RT (Radiographic Testing) Industrial radiography is used for a variety of applications but is commonly performed using two different sources of radiation, X-Ray and Gamma ray sources. The choice of radiation sources and their strength depends on a variety of factors including size of the component and the material thickness. Within the broad group of X-Ray and Gamma ray sources are a variety of camera choices with varying radiation strengths. CR Services X-Ray capabilities run the gamut from 4 MEV units utilized to radiograph extremely large and thick castings and forgings, to portable X-Ray cameras used for field weld applications and thin wall material inspection. Gamma sources vary from very low level fluoroscopic units to perform real time corrosion under insulation surveys, to Iridium (Ir192) and Selenium (Se 75) sources used for a variety of weld inspections, to Cobalt (Co 60) inspections for thick component testing. There are many advantages to radiography including: inspection of a wide variety of material types with varying density, ability to inspect assembled components, minimum surface preparation required, sensitivity to changes in thickness corrosion, voids, cracks and material density changes, the ability to detect both surface and subsurface defects and the ability to provide a permanent record of the inspection. The disadvantages of radiography are: safety precautions are required for the safe use of radiation, access to both sides of the specimen are required, orientation of the sample is critical, and determining flaw depth is impossible without additional angled exposures. Radiographic testing is used extensively on castings and weldments. Radiography is well suited to the testing of semiconductor devices for cracks, broken wires, unsoldered connections, foreign material and misplaced components. Sensitivity of radiography to various types of flaws depends on many factors, including type of material, type of flaw and product form.
...more
ndt training institute
20,000 Per Pack
Training And Certification This institute is an industry oriented training centre which recognizes the importance of the well trained manpower in effective implementation of appropriate Non-Destructive Testing techniques. This institute caters to the training requirements of engineers, supervisors and NDT operators. The faculty consists of well-qualified and experienced personnel [ASNT Level-III ] Training And Certification Radiographic Testing ( RT) Magnetic particle Testing (MT) Ultrasonic Testing (UT) Dye Penetrate Testing (PT) Safety QA and QC Mechanical QA and QC Civil PROJECT Courses for Mechanical & Civil Engg CSWIP Preparatory Classes Our Facilities include Reference books in NDT & material processing National & International NDT codes & specifications Reference Radiographs Sufficient Calibration Blocks & Reference Blocks Sufficient NDT specimens with covered defects in various configurations for practice Radiography Enclosure with darkroom Customer specific training Trainings Course Venue Liquid Penetrant Testing (PT) Level I II Pune Ultrasonic Testing (UT) Level I Pune Magnetic Particle Testing (MT) Level I II Pune Radiographic Testing (RT) Level III Pune Certification Course for QA QC Mechanical Pune Certification Course for QA QC Civil Pune Safety courses Pune
...more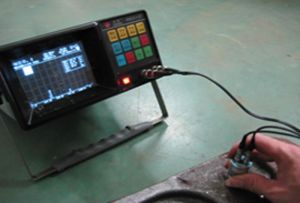
ndt services
Conventional ndt conventional applications such as radiography testing ultrasonic testing magnetic particle testing penetrant testing using advanced technology, delivered by highly-trained and experienced professionals. Advanced ndt advanced techniquestools for conducting exchanger tube inspection time of flight diffraction (tofd) phased array ultrasonic testing positive material identification (pmi) automated ultrasonic testing hardness testing.
...more
ndt consultancy services
We are one of the most admired Industrial service providers in the India. CR has skilled certified technicians who are experienced in providing various Non-Destructive Testing (NDT) and Industrial Services to the Oil, Gas, Petrochemical, Power, Desalination, Construction, Manufacturing Sectors and Civil Sector. NDT is concerned with revealing flaws in the structure of a product. NDT plays an important role in the quality control of a product. Whilst CR specializes in NDT services as well as industrial and Civil Services. Contact CR today and we will be happy to discuss your options in detail, and make recommendations that are appropriate to your needs. Conventional NDT Conventional applications such as Radiography Testing Ultrasonic Testing Magnetic Particle Testing Penetrant Testing using advanced technology, delivered by highly-trained and experienced professionals. Advanced NDT Advanced techniquestools for conducting Exchanger Tube Inspection MFL Tank Bottom Floor Testing Acoustic Emission Testing Small Proximity Radiation Exposure (SPRE) Long Range Pipeline Inspection Time of flight Diffraction (TOFD) Phased Array Ultrasonic Testing Positive Material Identification (PMI) Automated ultrasonic Testing Hardness Testing. Inspection Services Inspection Services such as Complete T&I support Third Party Inspection In-Service Inspection Vendor Inspection & Expediting. Industrial Services Industrial Services including Maintenance Shutdown & Turnaround Post Weld Heat Treatment. Aviation NDT Services Radiography Testing Ultrasonic Testing Magnetic Particle Testing Liquid Penetrant Testing Borescope Testing
...more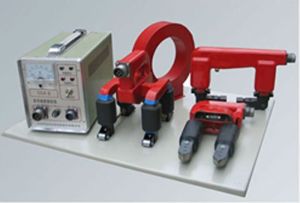
2500 Amp MPI Machine
We have 2500 amp mpi machine to check bright bar and black bar. We will charge as per ton wise. mt (magnetic particle testing) it is a non-destructive testing (ndt) process for detecting surface and slightly subsurface discontinuities in ferromagnetic materials such as iron, nickel, cobalt, and some of their alloys. The process puts a magnetic field into the part. The piece can be magnetized by direct or indirect magnetization. Direct magnetization direct magnetization occurs when the electric current is passed through the test object and a magnetic field is formed in the material. Indirect magnetization indirect magnetization occurs when no electric current is passed through the test object, but a magnetic field is applied from an outside source.
...more
Metal Testing Services
We are one of the most admired Industrial service providers in the India. CR has skilled certified technicians who are experienced in providing various Non-Destructive Testing (NDT) and Industrial Services to the Oil, Gas, Petrochemical, Power, Desalination, Construction, Manufacturing Sectors and Civil Sector. NDT is concerned with revealing flaws in the structure of a product. NDT plays an important role in the quality control of a product. Whilst CR specializes in NDT services as well as industrial and Civil Services. Contact CR today and we will be happy to discuss your options in detail, and make recommendations that are appropriate to your needs. Conventional NDT Conventional applications such as Radiography Testing Ultrasonic Testing Magnetic Particle Testing Penetrant Testing using advanced technology, delivered by highly-trained and experienced professionals. Advanced NDT Advanced techniquestools for conducting Exchanger Tube Inspection MFL Tank Bottom Floor Testing Acoustic Emission Testing Small Proximity Radiation Exposure (SPRE) Long Range Pipeline Inspection Time of flight Diffraction (TOFD) Phased Array Ultrasonic Testing Positive Material Identification (PMI) Automated ultrasonic Testing Hardness Testing. Inspection Services Inspection Services such as Complete T&I support Third Party Inspection In-Service Inspection Vendor Inspection & Expediting. Industrial Services Industrial Services including Maintenance Shutdown & Turnaround Post Weld Heat Treatment. Aviation NDT Services Radiography Testing Ultrasonic Testing Magnetic Particle Testing Liquid Penetrant Testing Borescope Testing
...more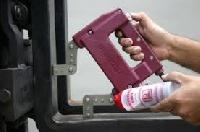
magnetic particle testing
500 Per Meter
Mt (magnetic particle testing) it is a non-destructive testing (ndt) process for detecting surface and slightly subsurface discontinuities in ferromagnetic materials such as iron, nickel, cobalt, and some of their alloys. The process puts a magnetic field into the part. The piece can be magnetized by direct or indirect magnetization. Direct magnetization direct magnetization occurs when the electric current is passed through the test object and a magnetic field is formed in the material. Indirect magnetization indirect magnetization occurs when no electric current is passed through the test object, but a magnetic field is applied from an outside source. Dry particle inspection in this magnetic particle testing technique, dry particles are dusted onto the surface of the test object as the item is magnetized. Dry particle inspection is well suited for the inspections conducted on rough surfaces. When an electromagnetic yoke is used, the ac or half wave dc current creates a pulsating magnetic field that provides mobility to the powder. The primary applications for dry powders are unground welds and rough as-cast surfaces. Dry particle inspection is also used to detect shallow subsurface cracks. Dry particles with half wave dc is the best approach when inspecting for lack of root penetration in welds of thin materials. Half wave dc with prods and dry particles is commonly used when inspecting large castings for hot tears and cracks. Wet suspension inspection wet suspension magnetic particle inspection, more commonly known as wet magnetic particle inspection, involves applying the particles while they are suspended in a liquid carrier. Wet magnetic particle inspection is most commonly performed using a stationary, wet, horizontal inspection unit but suspensions are also available in spray cans for use with an electromagnetic yoke.
...more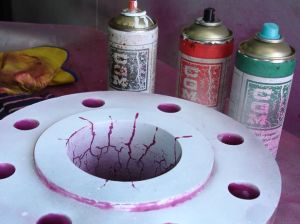
Liquid Penetrant Testing
500 Per Meter
Pt (dye penetrate testing) dye penetrant inspection (dpi), also called liquid penetrant inspection (lpi) or penetrant testing (pt), is a widely applied and low-cost inspection method used to locate surface-breaking defects in all non-porous materials (metals, plastics, or ceramics). The penetrant may be applied to all non-ferrous materials and ferrous materials, although for ferrous components magnetic-particle inspection is often used instead for its subsurface detection capability. Lpi is used to detect casting, forging and welding surface defects such as hairline cracks, surface porosity, leaks in new products, and fatigue cracks on in-service components. Dpi is based upon capillary action, where low surface tension fluid penetrates into clean and dry surface-breaking discontinuities. Penetrant may be applied to the test component by dipping, spraying, or brushing. After adequate penetration time has been allowed, the excess penetrant is removed and a developer is applied. The developer helps to draw penetrant out of the flaw so that an invisible indication becomes visible to the inspector. Inspection is performed under ultraviolet or white light, depending on the type of dye used - fluorescent or nonfluorescent (visible). Pt applications include metals (aluminum, copper, steel, titanium, etc.) glass many ceramic materials rubber plastics following defects are find out by pt liquid penetrant inspection can only be used to inspect for flaws that break the surface of the sample. Some of these flaws are listed below fatigue cracks quench cracks grinding cracks overload and impact fractures porosity laps seams pin holes in welds lack of fusion or braising along the edge of the bond line as mentioned above, one of the major limitations of a penetrant inspection is that flaws must be open to the surface.
...more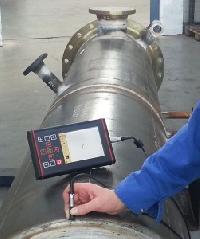
eddy current testing service
Eddy current testing continuous wave eddy current testing is one of several non-destructive testing methods that use the electromagnetism principle. Conventional eddy current testing utilises electromagnetic induction to detect discontinuities in conductive materials. A specially designed coil energised with alternating current is placed in proximity to the test surface generating changing magnetic-field which interacts with the test-part producing eddy current in the vicinity. Variations in the changing phases and magnitude of these eddy currents is then monitored through the use of receiver-coil(s), or by measuring changes to the alternate current flowing in the primary excitation-coil. The electrical conductivity variations or magnetic permeability of the test-part, or the presence of any discontinuities, will cause a change in eddy current and a corresponding change in phases and amplitude of the measured current. the changes are shown on a screen for easy interpretation. Another method of using the eddy current principle is pulsed eddy current testing. methods are being developed to investigate surfaces through protective coatings, weather sheetings, corrosion products and even the insulation materials. Inspection of surfaces at high temperature are possible with the eddy current technique as it is a non-contact method.
...more
dye penetrant testing services
DPT (Dye Penetrant Testing) Dye penetrant inspection (DPI), also called liquid penetrant inspection (LPI) or penetrant testing (PT), is a widely applied and low-cost inspection method used to locate surface-breaking defects in all non-porous materials (metals, plastics, or ceramics). The penetrant may be applied to all non-ferrous materials and ferrous materials, although for ferrous components magnetic-particle inspection is often used instead for its subsurface detection capability. LPI is used to detect casting, forging and welding surface defects such as hairline cracks, surface porosity, leaks in new products, and fatigue cracks on in-service components. DPT is based upon capillary action, where low surface tension fluid penetrates into clean and dry surface-breaking discontinuities. Penetrant may be applied to the test component by dipping, spraying, or brushing. After adequate penetration time has been allowed, the excess penetrant is removed and a developer is applied. The developer helps to draw penetrant out of the flaw so that an invisible indication becomes visible to the inspector. Inspection is performed under ultraviolet or white light, depending on the type of dye used - fluorescent or nonfluorescent (visible).
...more
dye penetrant testing
500 Per Meter
Pt (dye penetrate testing) dye penetrant inspection (dpi), also called liquid penetrant inspection (lpi) or penetrant testing (pt), is a widely applied and low-cost inspection method used to locate surface-breaking defects in all non-porous materials (metals, plastics, or ceramics). The penetrant may be applied to all non-ferrous materials and ferrous materials, although for ferrous components magnetic-particle inspection is often used instead for its subsurface detection capability. Lpi is used to detect casting, forging and welding surface defects such as hairline cracks, surface porosity, leaks in new products, and fatigue cracks on in-service components. Dpi is based upon capillary action, where low surface tension fluid penetrates into clean and dry surface-breaking discontinuities. Penetrant may be applied to the test component by dipping, spraying, or brushing. After adequate penetration time has been allowed, the excess penetrant is removed and a developer is applied. The developer helps to draw penetrant out of the flaw so that an invisible indication becomes visible to the inspector. Inspection is performed under ultraviolet or white light, depending on the type of dye used - fluorescent or nonfluorescent (visible). Pt applications include metals (aluminum, copper, steel, titanium, etc.) glass many ceramic materials rubber plastics following defects are find out by pt liquid penetrant inspection can only be used to inspect for flaws that break the surface of the sample. Some of these flaws are listed below fatigue cracks quench cracks grinding cracks overload and impact fractures porosity laps seams pin holes in welds lack of fusion or braising along the edge of the bond line as mentioned above, one of the major limitations of a penetrant inspection is that flaws must be open to the surface.
...moreBe first to Rate
Rate ThisOpening Hours