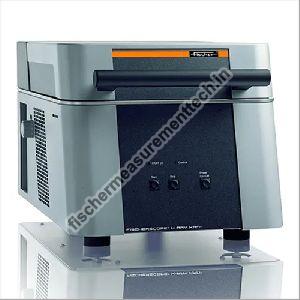
X-RAY XAN-FD Gold Testing Machine For Assaying Refinery & Tunch
Get Price Quote
Gold testing machine in hallmarking centres: XAN-FD is a fast and non-destructive coating thickness measurement and material analysis. These are compact in size and widely applicable as an energy-dispersive X-ray fluorescence measuring instrument.Our machines are extensively used for non-destructive thickness measurements and material analysis. These are fitted with electrically changeable apertures and primary filters and modern silicon PIN detector for excellent detection sensitivity and high accuracy. These can be used for coating systems as well as solid and liquid Samples can be analyzed standard-free. Besides, these can easily measure up to 24 elements in a Range from aluminum (13) to uranium (92) simultaneously.Our machines are acclaimed for their long term stability, excellent accuracy, long term stability and ergonomic design. These are very easy to operate and acclaimed for fast calculation and quick data presentation. These are well suited for measuring and analyzing thin coatings, even with very complex compositions or small concentrations. Design We provide user friendly bench-top instruments. These are available in two different range including XAN-FD and XAN 152 and these differ in support stage and the housing size These are ideal to measure range of up to 22 mm. straightened with the integrated video-microscope with crosshairs and up to 184x zoom factor simplifies sample placement, these devices are very easy to install, operate and maintain These are operated through powerful WinFTM® 2 FISCHERSCOPE® X-RAY XAN®-FD, XAN® 152 -FD, XAN® XAN® 152 software, which make these very user friendly and easy to use. Typical areas of application are Measurement of functional coatings in the electronics and semiconductor industries Analysis of alloys in the jewellery and watch industries Research in universities and in the industries General Specifications Intended use Energy dispersive X-ray fluorescence measuring instrument (EDXRF) to determine thin coatings and alloys Element range Aluminum (13) to Uranium (92), up to 24 elements simultaneously Design Bench-top unit with hood opening upwards Measuring direction Bottom-up method X-ray source X-Ray tube Micro focus tungsten tube with beryllium window High voltage Three steps 10 kV, 30 kV, 50 kV Aperture (collimator) 4x changeable: 0.2 mm, 0.6 mm, 1 mm, 2 mm, others on request Primary filter 3x changeable: Nickel, Aluminum, free, others on request Measurement spot Depending on the measuring distance and on the aperture in use; the actual measurement spot size is shown in the video image. Smallest measurement spot: approx. 0.3 mm Measuring distance 0 20 mm (0 0.8 in) Distance compensation with patented DCM method for simplified measurements at varying distances. For particular applications an additional calibration might be necessary. X-ray detection X-ray detector Silicon PIN detector with peltier cooling and Resolution 180 eV (fwhm at Mn-K±)Sample orientation Video microscope:High-resolution CCD color camera for optical monitoring of the measurement location along the primary beam axis,Crosshairs with a calibrated scale (ruler) and spot-indicator,Adjustable LED illumination of the measurement location Zoom factor:34x ... 184x (optical: 34x46x; digital: 1x, 2x, 3x, 4x)