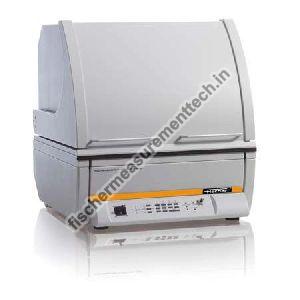
XAN SDD XDV-SDD Gold Testing Machine For Hallmarking Centres
Get Price Quote
The high-end measurement system Fischerscope X-Ray XAN SDD was developed specifically for non destructive, high precision analysis of thin gold and precious metal coatings. Gold testing machine in hallmarking centres: XDV-SDD is engineered under the firm direction of expert quality controllers. These are basically X-ray fluorescence measuring instrument with a programmable XY-stage and Z-Axis for Automated Measurements of very thin coatings and for trace analysis. These are extensively used as an energy-dispersive X-ray fluorescence measuring instrument for the measurement and analysis of very thin coatings or small concentrations in the trace analysis. Design These are universally applicable energy-dispersive X-ray fluorescence measuring instrument widely used for measuring and analyzing very thin coatings or small concentrations in the trace analysis. These have programmable XY-stage, which make these perfect for auto-mated sample measurements. These are featured with electrically changeable apertures and primary filters and modern silicon drift detector to ensure high accuracy, good detection sensitivity, long term stability and outstanding accuracy. These are widely recommended by clients owing to its precise design, robust design, longer service life and effective usage. These are user-friendly bench-top instrument equipped with programmable XY-stage and an electrically driven Z-axis for automatic measurement. These are also fitted with a laser pointer, integrated video-microscope with zoom, protective hood and cross-Hairs simplifies sample placement for perfect measurement. These are operated using the powerful and user-friendly WinFTM® software, for entire operation and evaluation of measurements as well as the clear presentation of measurement data is performed on a PC. Typical areas of application are: Analysis of very thin coatings, e.g. gold/palladium coatings of 0.1 ¼m Trace analysis on pc boards according to ROHS and WEEE requirements Gold analysis Measurement of functional coatings in the electronics and semiconductor industries Determination of complex multi-coating systems Automated measurements, e.g., in quality control General Specification Intended use: Energy dispersive X-ray fluorescence measuring instrument (EDXRF) to determine thin coatings and alloys Element range: Aluminum Al (13) to Uranium U (92) â up to 24 elements simultaneously Design: Bench-top unit with hood opening upwards XY-stage and Z-axis electrically driven and programmable,Motor-driven changeable apertures and filters Video camera and laser pointer (class 1) for orienting the sample Measuring direction: From top to bottom X-Ray Source X-ray tube Micro focus tungsten tube with beryllium window High voltage Three steps 10 kV, 30 kV, 50 kV Aperture (Collimator): 4x changeable: 0.2 mm (7.9 mils), 0,6 mm (23.6 mils), 1 mm (39.4 mils), 3 mm (118 mils), others on request Primary filter: 6x changeable (Ni, free, Al 1000 ¼m (39.4 mils), Al 500 ¼m (19.7 mils), Al 100 ¼m (3.9 mils), Mylar® 100 ¼m (3.9 mils) Measurement spot size: Depending on measurement distance and aperture, Measurement spot size aperture size + 10% The actual measurement spot size is shown in the video image. Smallest Measurement spot: approx. 0.25 mm (9.8 mils) X-Ray Detection X-ray detector : Silicon Drift Detector (SDD), peltier-cooled Resolution (fwhm for Mn-K±)¤ 140 eV Measurement distance:0 80 mm (0 3.1 in) Distance compensation with patented DCM method for simplified measurements at varying distances. For particular applications or for higher demands on accuracy an additional calibration might be necessary. Sample Alignment Video microscope High-resolution CCD color camera for optical monitoring of the measurement location along the primary beam axis,manual focusing and auto-focus, crosshairs with a calibrated scale (ruler) and spot-indicator,adjustable LED illumination, laser pointer (class 1) to support accurate sample placement. Zoom factor Digital 1x, 2x, 3x, 4x Focusing Auto-focus and manually controlled motor focus.Manual adjustment of the focal plane in a range from 0 to 80 mm. Sample Stage Design Fast, programmable XY-stage with pop-out function Maximum travel X/Y-axis: 250 mm x 250 mm (9.8 x 9.8 in); Z-axis: 140 mm (5.5 in) Max. travel speed 60 mm/s (0.2 ft/s) Repeatability precision XY unidirectional: 5 ¼m (0.2 mils) max., 2 ¼m (0.08 mils) typ. Usable sample placement area 370 x 320 mm (14.6 x 12.6 in) Max. sample weight5 kg (11 lb), with reduced approach travel precision 20 kg (44 lb) Max. sample height 140 mm (5.5 in) Electrical Data Power supplyAC 115 V or AC 230 V 50 / 60 Hz Power consumptionMax. 120 W ,without evaluation PC Protection class IP40 Dimensions External dimensionsWidth x depth x height [mm]:660 x 835 x 720 mm, [in]: 26 x 32.9 x 28.3 Interior dimensions Width x depth x height [mm]: measurement chamber 580 x 560 x 145 mm, [in]: 22.8 x 22 x 5.7 Weight Approx. 140 kg (308 lb) Environmental Conditions Temperature: Operation10°C 40°C / 50 ° 104 °F Temperature:0 °C 50°C / 32 F 122°F Storage/Transport Admissible air humidity: 95 %, non-condensing Evaluation Unit Computer Windows®-PC Software Standard: Fischer WinFTM® BASIC including PDM®, Optional: Fischer WinFTM® SUPER Standards CE approval EN 61010 X-Ray standards DIN ISO 3497 and ASTM B 568 Approval Fully protected instrument with type approval according to the German regulations "Deutsche Rontgenverordnung-RoV".