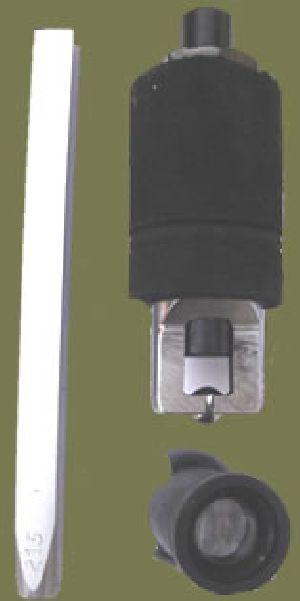
NOBLE POLDI HARDNESS TESTER
Get Price Quote
DIRECTIONS FOR USE OF POLDI HARDNESS TESTER MODEL “NP”: Insert the tapered end of the standard test bar after cleaning into the space provided between the ball and the plunger and slide it further beyond the tapered position. The test bat will thus be firmly gripped between the ball and the plunger pressed by a spring. The specimen to be tested be properly ground or filed and polished at the surface where it is to be tested to ensure accurate readings, With standard test bar inserted place the tester vertically on the specimen such that the ball touches the polished surface. Give a blow on the top of the plunger, with a hammer. The blow should not be very hard and should as vertical as possible. The blow will cause two indentations, one on the standard test bar and the other on the specimen. The diameters of these two indentations should be measured accurately with magnifier having, lease count of 0.1 mm provided with the machine. If the indentations so obtained are slightly elliptical, average diameter should be found out. The distance between the centers of any two indentations on standard test bar should be less than 15mm. If the bar is fully utilized it has to be replaced. The limiting indentation diameter on the standard test bar is 4.2mm. SPECIFICATION OF POLDI TESTER MATERIAL : ALLOY STEEL EN-8 OR EN-9 DIA : 30 MM LENGTH : 85 MM TUNGSTON CARBIDE BALL DIA 10 MM POLDI BAR MATERIAL : ALOOY STEEL EN-8 OR EN-9 OR CARBEN STEEL- WPS SIZE : 12mm x 12mm x 150mm EYE PIECE : 8 X BRINELL MICROSCOPE 25 X (OPTIONAL AT EXTRA COST) Tensile strength and Brinell Hardness Numbers of various metals can be found as under : STEELS The booklet contains two tables, one for steel in natural of annealed state and the other for steels in hardened or hardened and tempered state. It is necessary to know the condition of specimens before and It, however it is not known or cannot be determined then first tables for natural or annealed steels be used for specimens having Brinell hardness of up to 360. When the hardness of the specimens exceeds 360, the other tables are to be used. OTHER METALS Separate Tables have been provided for other metals, e.g. Brass, Copper, Aluminium, Bronze and Cast Iron. These tables do not show the tensile strength of these metals but only the Brinell hardness number because the relation between the Brinell hardness & the corresponding tensile strength has not yet established with as much reliability as in the case of steels. PROCEDURE After measuring the actual dia of indentation on standard test bar the column “Dia of indentation on standard test bar” should be referred for the same value and for actual dia of indentation on work piece the raw “Dia of indentation on work piece” should be referred. Where the horizontal and vertical columns intersect the tensile strength in tones per sq. in (the upper figures) and the Brinell Hardness Numbers (the lower figures) can be read. To convert tensile strength from tons / sq. in to Kg. / sq. mm use a multiplying factors of 1.575. To take care of the varieties in the tensile strength and the hardness of standard test bars coming out of production, each test bar is properly tested and a multiplying factor is inscribed on it, at one end. For determining the exact tensile strength and hardness of specimens, multiply, the reading found from the tables by this multiplying factor. EXAMPLE Diameter of ball indentation - 1) On the test bar 1.8 mm. 2) On the specimen (steel in natural condition) 1.7 mm. Tensile strength founds from Tables 50.8 tone/sq. inch after multiplying with 1.575 to convert in to kg/sq. mm comes to 80 Kg./sq.mm. Brinell Hardness Number found from tables 225 BHN. Multiplying factor inscribed on standard test bar: 1.14. Therefore, the tensile strength of specimen is 80 x 1.14 = 91.20 Kg/sq. mm in and the Brinell hardness = 225 x 1.14 = 256.5 BHN. When after some use, the protruding end of the plunger gets deformed by blows, it may be reconditioned and rounded off again or simply replaces. Poldi type Impact Hardness Tester is not designed to replace the tensile strength testing machine or standard hardness tester. The accuracy of this hardness tester may very sometimes to the extent +/- 10% as against the more accurate table type standard Hardness testers. However, the Poldi Impact Hardness Tester has the advantage of easy handling and greater flexibility. This is very important, especially for testing heavy specimens who cannot be taken to table type hardness are extremely costly eompared to Poldi tester and require greater skill to operated properly.